
Host Your Free Personal Knowledge Base With Trilium Notes

Complete Guide on Install and Configure Trilium Notes App using Trilium, Nginx, Docker, and Oracle Cloud
Trilium Notes is an open-source note-taking App for building a personal knowledge base. It is a surprisingly powerful tool, including some impressive features like mermaid charts, WYSIWYG note editing, syntax highlighting, full-text search, etc.
Trilium can be installed on a desktop or on your own server. The most common approach is to use Docker to set up the App on a cloud VM so you can access it from anywhere. There are 3rd party paid services to host a Trilium instance for you and some free options.
In this article, I will walk through the process of hosting it on an Oracle always free VM instance .
Oracle forever free VM
Recently, I migrated a MySQL server to Oracle forever-free VM. The free ARM-based VM has three core CPUs and 18 G memory, and its current CPU and memory utilization is very low, as shown below.

Its remaining capability is more than enough to host a Trilium App.
Let’s do it.
Install the App using Docker
Firstly, we need to install docker on the Oracle VM. I won’t go through the process in detail, as it is described on the official Docker site . Below are the essential commands for the installation.
1 | sudo apt-get update |
Now we can pull the Trilium docker image and run it as below.
1 | sudo docker pull zadam/trilium:0.58.7 |
In the above commands, the following actions are performed
- The trilium image version 0.58.7 (the latest available at the time of writing) is pulled.
- The data volume is mapped to the
/trilium-datadirectory on the host machine - The Docker port is mapped to port 8080 on the host machine
- Access to the app is allowed from any IP address
As you can see, it is pretty straightforward to run a trilium app with Docker.
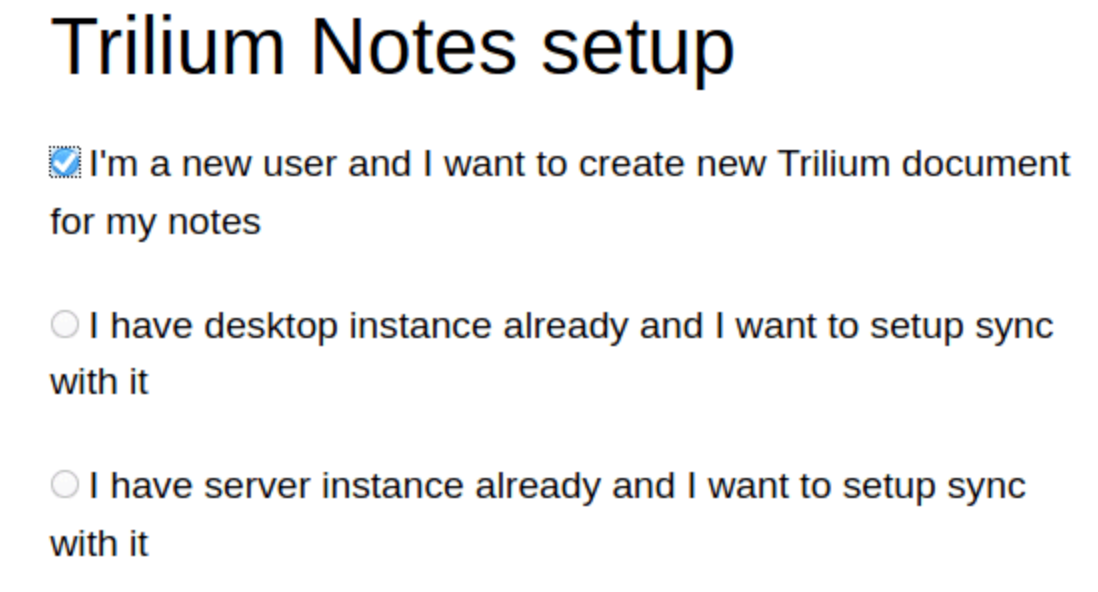
If you test the new instance from your browser using the URL:[http://[IP](http://[ip/) address]:8080, the setup screen should be shown.
Secure the App with Ngnix and SSL certificate.
The next step is to secure the App, make it accessible behind a reverse proxy and install an SSL certificate to protect the communication between the browser and the server.
Firstly, let’s install the Nginx server.
1 | sudo apt install nginx # install |
We can verify that the new instance is listening to port 80.
1 | sudo netstat -tulpn |

Once Nginx is installed, a free Let’s Encrypt SSL certificate can be created, and the appropriate configuration can be added to Nginx.
1 | sudo apt-get install certbot |
To set up the auto-renew of the certificate:
1 | #setup auto renew certificate |
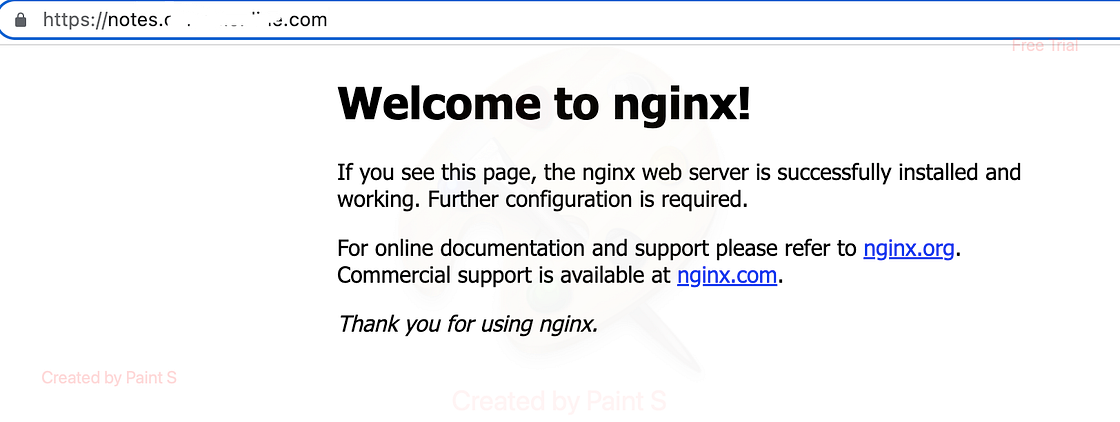
If you own a domain name, you can set up a sub domain for your new Trilium app. For example, create an A record fornotes.xxx.com, and map it to your VM IP address. This will allow you to access the URL [https://notes.xxx.com](https://notes.xxx.com/) in the browser.
The final step is to configure the redirect in the Nginx. The Nginx configuration file can typically be found in either /etc/nginx/nginx.conf or /etc/nginx/sites-enabled/default. The default setting is something like the one below.
1 | server_name notes.xxx.com; # managed by Certbot |
The location section needs to be updated as below, so the request to port 443 will be directed to port 8080 at the VM.
1 | location / { |
To make the change effective, we should restart Nginx. Then, you can enjoy the new App instance by accessing https://notes.xxx.com.

Troubleshooting: Notes don’t refresh
If you got an issue where refreshing the browser is necessary to view changes in Trillium Notes, It may be caused by the missing nginx proxy setting to support the web socket.
To determine whether it is the cause, open the Chrome dev tools, to check for the below error is shown.

To fix the issue, log in to the server and update Nginx config file as follows:
1 | location / { |
After the update, don’t forget to restart the Ngnix server.
Summary
Trilium is a great note-taking App. It is lightweight, able to work offline, fast, and works well on a mobile browser.
There are a couple of advanced topics being skipped in this article
- Install multiple instances of the App on a single VM
- Automatical backup of the data
- Sync data between multiple apps
If you are interested in these topics, leave a comment below. I will write another post to cover them if there is enough interest.
Happy noting!
- Title: Host Your Free Personal Knowledge Base With Trilium Notes
- Author: Sunny Sun
- Created at : 2023-02-12 00:00:00
- Updated at : 2024-07-09 21:31:51
- Link: http://coffeethinkcode.com/2023/02/12/host-free-personal-knowledge-base/
- License: This work is licensed under CC BY-NC-SA 4.0.